
Overview
A service mesh like Linkerd is a tool for adding observability, security, and reliability features to “cloud native” applications. The service mesh is rapidly becoming a standard part of the cloud native stack, especially for Kubernetes.
Let's take a look into how the service mesh works. Describe where the service mesh is and what to expect.as this concept evolves alongside cloud native adoption.
For incoming and outgoing traffic and for communication between services it can:
- Secure communication
- Traffic management
- Monitoing traffic, send logs and metrics to Prometheus
So a service mesh is an extremely powerful tool.
It typically implemented as a scalable set of network proxies deployed alongside application code (a pattern sometimes called a sidecar). These proxies handle the communication between the microservices and also act as a point at which the service mesh features can be introduced. The proxies comprise the service mesh’s data plane, and are controlled as a whole by its control plane.
An more in-depth clarification under https://linkerd.io/what-is-a-service-mesh/
Environment preparation
Linkerd requires a Kubernetes cluster on which to run. Where this cluster lives is not important: it might be hosted on a cloud provider, may be running on your local machine, or even somewhere else.
Prerequisites : Kubernetes, Docker, kubectl, kind
- Install Docker
- Install Kubernetes
- Install kubectl
- Install Helm
- Install Kind
Creating a cluster
You can create multiple clusters if necessary. Add the --name parameter to the kind cluster create command to give them identifying names.
kind create cluster --name $clusterName
In our case $clusterName=linkerd
Check which nodes are ready
JSONPATH='{range .items[*]}{@.metadata.name}:{range @.status.conditions[*]}{@.type}={@.status};{end}{end}' \
&& kubectl get nodes -o jsonpath="$JSONPATH" | grep "Ready=True"

Add nginx ingress controller into our cluster
Nginx-ingress : https://docs.nginx.com/nginx-ingress-controller/installation/installation-with-helm/
Check ingress
kubectl get svc -A

Linkerd
If this is your first time running Linkerd, you will need to download the linkerd CLI onto your local machine. The CLI will allow you to interact with your Linkerd deployment.
To install the CLI manually, run:
curl --proto '=https' --tlsv1.2 -sSfL https://run.linkerd.io/install | sh
Install Linkerd onto your cluster
Now that you have the CLI running locally and a cluster that is ready to go, it’s time to install.
Install the CRDs first
linkerd install --crds | kubectl apply -f -
Install the Linkerd control plane once the CRDs have been installed
linkerd install | kubectl apply -f -
Verification
linkerd check

You should see a piece of ✅ right at the end.
Viz manages the linkerd-viz extension of Linkerd service mesh.Lets check the services inside linkerd-viz namespace.
kubectl get svc -n linkerd-viz
We sould have web service there allong the rest.

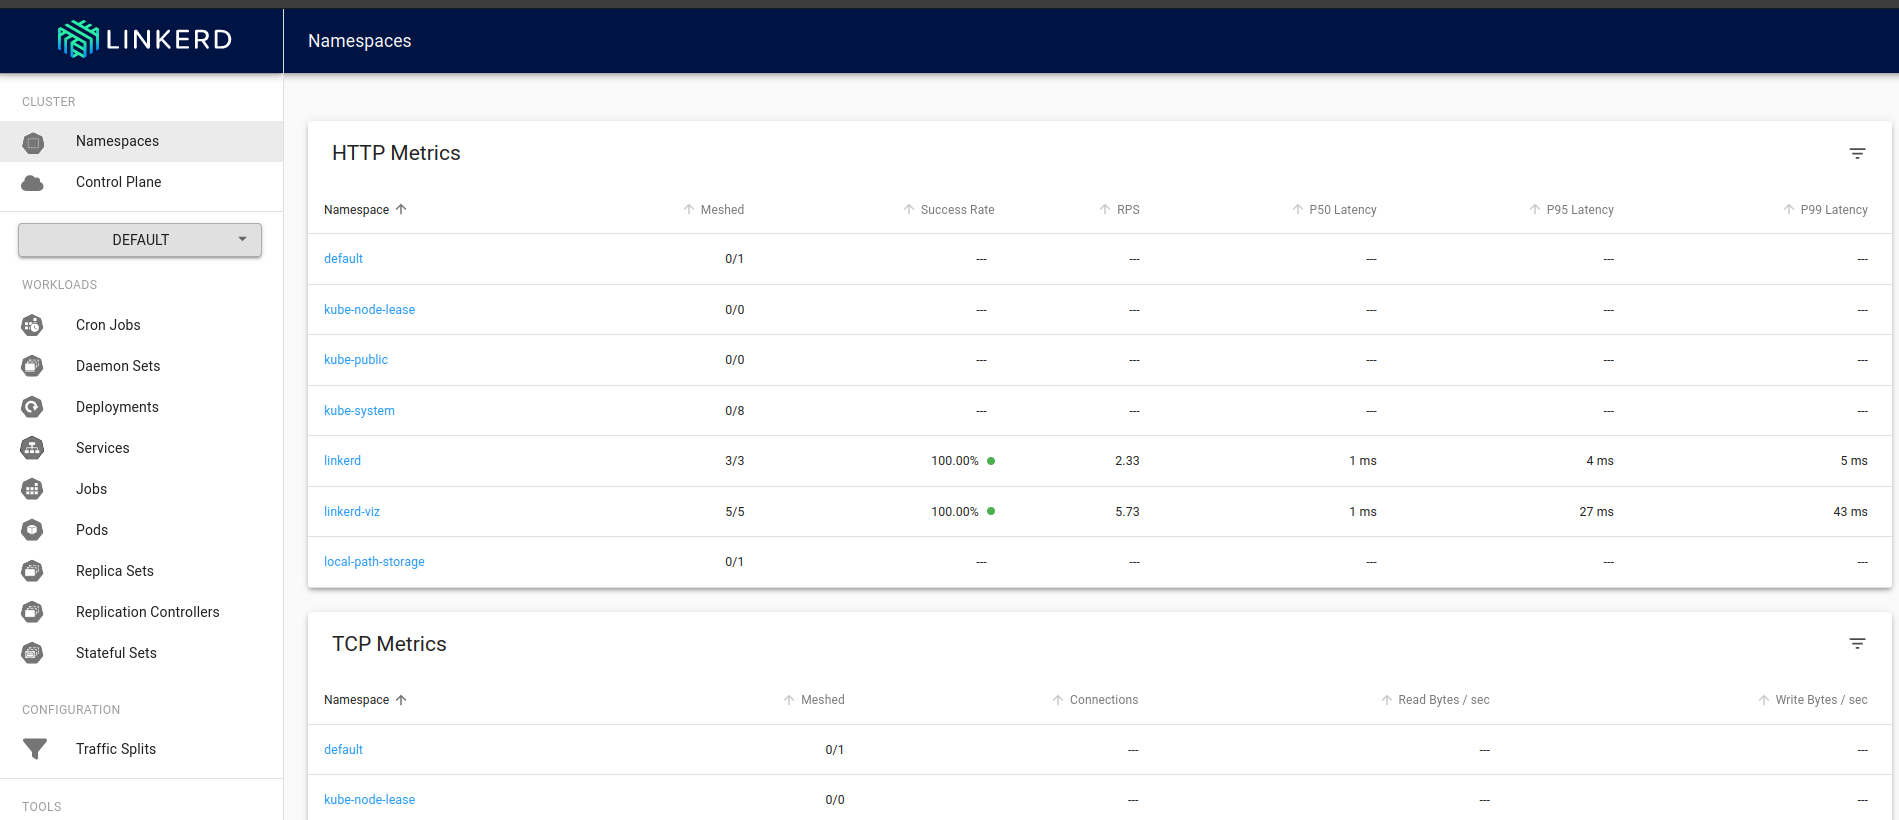
View Dashboard
In order to access the dashboard we port-forward our web service under linkerd-viz namespace.
kubectl -n linkerd-viz port-forward svc/web 8084
We can access the dashboard via http://127.0.0.1:8084/namespaces
Install the demo app
Congratulations, Linkerd is installed!
Install Emojivoto into the emojivoto namespace by running:
kubectl create ns emojivoto
curl --proto '=https' --tlsv1.2 -sSfL https://run.linkerd.io/emojivoto.yml \
| kubectl apply -f -

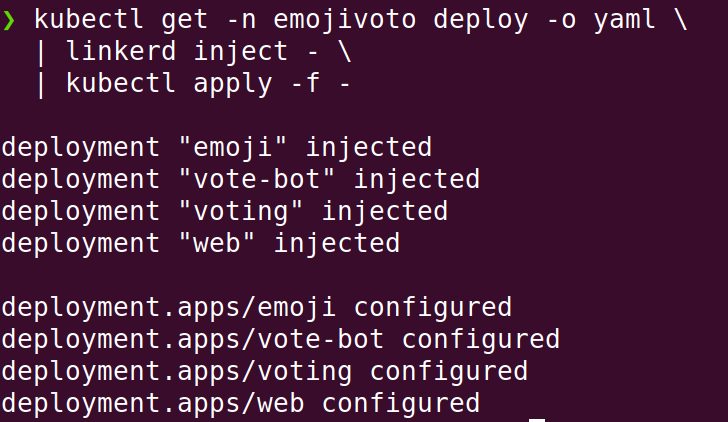
Emojivoto services are up and running, now we can mesh them by adding Linkerd’s data plane proxies to it. We can do this on a live application without downtime, thanks to Kubernetes’s rolling deploys. Mesh your Emojivoto application by running:
kubectl get -n emojivoto deploy -o yaml \
| linkerd inject - \
| kubectl apply -f -
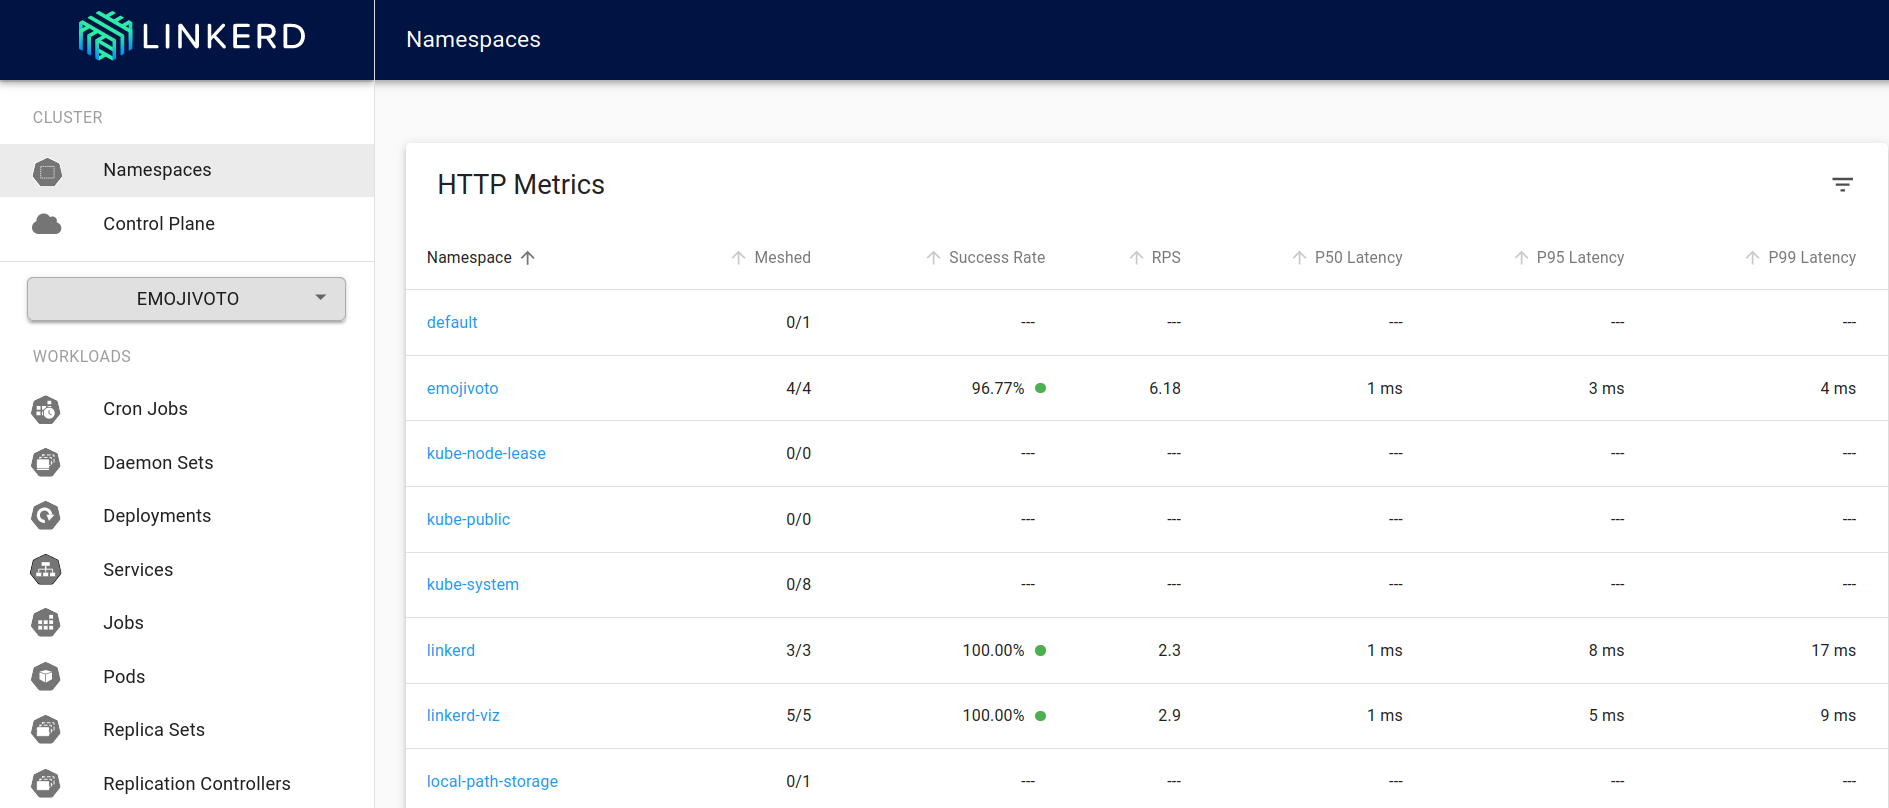
With the control plane and extensions installed and running, we can now access the dashboard with:
linkerd viz dashboard &

Congratulations, you have now learned the basic tricks of Linkerd functionality!


